What the heck is exactly Kubernetes? 🔍
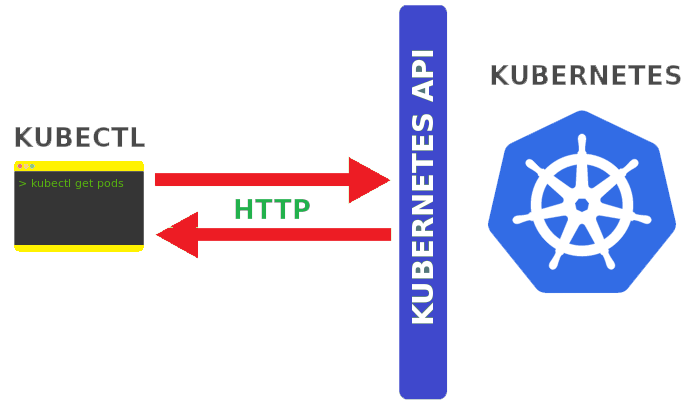
Kubernetes aka K8’s is an open-source system for automating deployment, scaling, and management of containerized applications. It groups containers that make up an application into logical units for easy management and discovery.
Kubernetes celebrates its birthday every year on 21st July. Kubernetes 1.0 was released on July 21 2015, after being first announced to the public at Dockercon in June 2014.
Source: What is Kubernetes
A brief History 📜
Kubernetes is known to be a descendant of Google’s system BORG
The first unified container-management system developed at Google was the system we internally call Borg. It was built to manage both long-running services and batch jobs, which had previously been handled by two separate systems: Babysitter and the Global Work Queue. The latter’s architecture strongly influenced Borg, but was focused on batch jobs; both predated Linux control groups.
Source: Kubernetes Past
Enough bio, Let’s get started!
Assuming that you’ve a bit of knowledge about Docker & how it works, this blog will help you get started on deploying your REST API in Kubernetes. But first, we’ll set up a local Kubernetes cluster, then create a simple API to deploy.
Process ⚙️ :—
(1) ➤ Set Up Kubernetes on your Local
There’s a couple options for running Kubernetes locally, with the most popular ones including k3s, minikube, kind, microk8s. In this guide, any of these will work, but we will be using k3s because of the lightweight installation.

Install k3d, which is a utility for running k3s. k3s will be running in Docker, so make sure you have that installed as well. We used k3d v4.x in this blog.
1curl -s https://raw.githubusercontent.com/rancher/k3d/main/install.sh | bash
Now, set up a cluster named test:
- The port flag is for mapping port 80 from our machine to port 80 on the k3s load balancer. This is needed later when we use ingress.
1k3d cluster create test -p "80:80@loadbalancer"
Optionally, check that your kubeconfig got updated and the current context is correct:
1kubectl config view2kubectl config current-context
Optionally, confirm that k3s is running in Docker. There should be two containers up, one for k3s and the other for load balancing:
1docker ps
Make sure that all the pods are running. If they are stuck in pending status, it may be that there is not enough disk space on your machine. You can get more information by using the describe command:
1kubectl get pods -A2kubectl describe pods -A
Tip : There’s a lot of kubectl commands you can try, so I recommend checking out the list of resources and being aware of their short names:
1kubectl api-resources
(2️) ➤ Create a Simple API
As we move forward, we will create a simple API using Express.js.
Set up the project:
1mkdir test-backend-api && cd test-backend-api2touch server.js3npm init4npm i express --save
Setup the server
1// server.js2const express = require("express");3const app = express();45app.get("/user/:id", (req, res) => {6 const id = req.params.id;7 res.json({8 id,9 name: `neilblaze #${id}`10 });11});1213app.listen(80, () => {14 console.log("Server started running on port 80");15});
Optionally, you can directly test it using Postman or try running it if you have Node.js installed and test the endpoint /user/{id} with curl:
1node server.js23// request:4curl http://localhost:80/user/00756// response: {"id":"007","name":"neilblaze #007"}
Next, add a Dockerfile and .dockerignore:
1// Dockerfile2FROM node:1234WORKDIR /user/src/app5COPY package*.json ./6RUN npm i7COPY . .89EXPOSE 8010CMD ["node", "server.js"]
1// .dockerignore2node_modules
Then, build the image and push it to the Docker Hub registry! Once you’re done, do this,
1docker build -t <YOUR_DOCKER_ID>/test-backend-api2docker push <YOUR_DOCKER_ID>/test-backend-api
(3) ➤ Final Step — Deploy
Now, we deploy the image to our local Kubernetes cluster. We use the default namespace.
Create a deployment:
1kubectl create deploy test-backend-api --image=neilblaze/test-backend-api
- Alternatively, create a deployment with a YAML file:
1kubectl create -f deployment.yaml
1// deployment.yaml2apiVersion: apps/v13kind: Deployment4metadata:5 name: test-backend-api6 labels:7 app: test-backend-api8spec:9 replicas: 110 selector:11 matchLabels:12 app: test-backend-api13 template:14 metadata:15 labels:16 app: test-backend-api17 spec:18 containers:19 - name: test-backend-api20 image: neilblaze/test-backend-api
Create a service:
1kubectl expose deploy test-backend-api --type=ClusterIP --port=80
- Alternatively, create a service with a YAML file:
1kubectl create -f service.yaml
1// service.yaml2apiVersion: v13kind: Service4metadata:5 name: test-backend-api6 labels:7 app: test-backend-api8spec:9 type: ClusterIP10 ports:11 - port: 8012 protocol: TCP13 targetPort: 8014 selector:15 app: test-backend-api
Check that everything was created and the pod is running:
1kubectl get deploy -A2kubectl get svc -A3kubectl get pods -A
Once the pod is running, the API is accessible within the cluster only. One quick way to verify the deployment from our localhost is by doing port forwarding:
- Replace the pod name below with the one in your cluster
1kubectl port-forward test-backend-api-xxxxxxxxxx-yyyyy 3000:802// replace those 'x' & 'y' with your credentials
- Now, you can send a curl request from your machine
1curl http://localhost:3000/user/007

NOTE : To correctly manage external access to the services in a cluster, we need to use ingress. Close the port-forwarding and let’s expose our API by creating an ingress resource.
An ingress controller is also required, but k3d by default deploys the cluster with a Traefik ingress controller (listening on port 80).
Recall that when we created our cluster, we set a port flag with the value “80:80@loadbalancer”. If you missed this part, go back and create your cluster again.
Create an Ingress resource with the following YAML file:
1kubectl create -f ingress.yaml2kubectl get ing -A
1// ingress.yaml2apiVersion: networking.k8s.io/v13kind: Ingress4metadata:5 name: test-backend-api6 annotations:7 ingress.kubernetes.io/ssl-redirect: "false"8spec:9 rules:10 - http:11 paths:12 - path: /user/13 pathType: Prefix14 backend:15 service:16 name: test-backend-api17 port:18 number: 80
To try this out, do this —
1curl http://localhost:80/user/007
References
- Kubernetes, Andy Yeung, Google, Docker, Layer5 Docs

Conclusion
Kubernetes with its declarative constructs and its ops friendly approach has fundamentally changed deployment methodologies and it allows teams to use GitOps. Teams can scale and deploy faster than they ever could in the past. Instead of one deployment a month, teams can now deploy multiple times a day.
That is all, I hope you liked the post. Thank you very much for reading, and have a great day! 😄